
Introduction
Note There’s a better way of doing this with multibranch pipelines, which I recommend over this method.
You may need to build jenkins jobs when branches/PRs are made from within the repository – say, to run tests. You may also want to report on the test status when finished. And you may have found doing this quite frustrating. If these things are true, join me on a journey…
Introduction
For a work project, I needed to integrate Jenkins tests with Github repositories. Basically, we make pull requests from branches within the repository against master, and then merge them when review and testing passes. For running automated tests, we use Jenkins, and so we want to be able to trigger the jenkins job when a PR is created and also change the PR check status to passed or failed depending on the results.
Assumptions
There are many different ways of doing these things, so it’s quite important that I list my assumptions early on so that you don’t waste your time reading a blog post that doesn’t actually help you. These assumptions held true for the case that I wanted to solve, and your circumstances may well be different.
- You don’t use Jenkins multibranch pipelines – if you do, certain things will be easier, but there still may be information here that helps you.
- You want to build PRs from branches within the same repository (as is the case for most private/corporate projects) rather than PRs from forks (as is the case for most FOSS projects).
Requirements
- 2GB of RAM or more, Jenkins is very memory hungry…
- A Jenkins installation – if you’re like me and don’t want to experiment on your company’s actual Jenkins install, it may be smart to invest in a Linux box such as a DigitalOcean, AWS, Linode, or other cloud provider virtual machine.
Since it needs to be able to receive Github webhooks, it has to be accessible from the Internet, or from wherever you’re hosting your Github Enterprise instance. Thus, you unfortunately most likely can’t get away with just playing with this on a local VM or docker container – sorry! But some of the cloud providers mentioned above have hourly pricing, so it shouldn’t cost you too much. - A Github project that you want to integrate with, duh!
- A way to relax (trust me, you’ll need it…)
- A lot of patience
Setup
Github Access
The first step is setting up Github settings in a way that allow Jenkins to update PR status. Technically, it doesn’t matter if you do this step or the next step first, but it’s part of laying down the groundwork for later. Unfortunately, as much as we try to group things that need to be done in Github and Jenkins separately, we’ll need to go between the two platforms quite a lot, so get ready for that.
Having said that, I’ll try to put as many things that are done on a single platform together as physically possible, so if something doesn’t make sense right away, don’t worry, it’ll all come together eventually. I hope.
Make a user with write access
First, make sure you have a user with write access to your repository that you can use for this. Don’t worry, we won’t end up allowing Jenkins to have full write access, but due to how Github works this is required. You can use an already existing user or make a new one and you can lock it down as much as you feel you need to to make sure it’s safe.
Create a personal access token
Personal access tokens allow access to the Github API by using a token instead of your username and password. In addition to this, they can be locked down to only have the permissions that are absolutely necessary. As such, this is one of the safest ways to integrate with any service.
- Go to Github Settings (Accessible by clicking on your avatar on the top right)
- Click on developer settings near the bottom.
- Click on personal access tokens.
- Click generate new token
- For this, the only required scope is “repo:status“. This means that the token that you are generating can be used to update commit status, but can’t be used for anything else.
- Save the token somewhere, you won’t be able to get it again. We’ll need it again later on in the post to set up Jenkins integration.
Jenkins plugins & setup
Now that that’s done, we need to do the groundwork to allow Github to trigger Jenkins builds, so let’s head over to our jenkins install for this next step.
For this task, you just need the Github plugin for Jenkins. This provides a webhook URL, which is <YOUR_JENKINS_INSTANCE_URL/github-webhook>. You can visit that URL manually to see if it works; if you see “Method POST required” then it’s already set up.
Integration
Now that you have Github access set up and the Jenkins plugin installed, it’s go time!
Create Jenkins job
If you already have the job you want to use, you can edit it so that it matches these settings instead.
- Go to your Jenkins install
- Click ‘create item‘
- Click ‘freestyle project’ – once again we’re assuming you’re not using pipelines. If you are, then your life is much easier.
- Tick github project and add your project URL
- Add the repository in source code management – this requires either the credentials of a user with at least read-only access, or for your repository to be public.
- Leave branches to build blank so you can build PR branches.
- Select at least the ‘GitHub hook trigger for GITScm polling’
- Add a build step that runs your tests; I’ll leave this one to you.
- Click ‘save’ for now; we will need to make more edits later, but it’s good to get the base case working first.
Trigger Jenkins builds from Github
Remember the github-webhook URL from earlier? It’s that url’s time to shine. Time to add it as a webhook in our github repo, so that it triggers builds.
- Go to settings within your github repo
- Click on Webhooks
- Put the payload URL as the URL from earlier, e.g.
YOUR_JENKINS_INSTANCE_URL/<github-webhook>. - Select “send me everything“. I’m not sure it’s required but it really doesn’t matter.
- Save the webhook.
Now, make a PR with at least one commit. If all goes well, you should see the job build in jenkins:
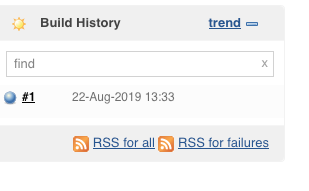
If it doesn’t go well, click ‘Github Hook Log‘ and hope that you can diagnose the problem. If not, you may need your patience and ways of relaxing from the Requirements section, plus a heavy dose of StackOverflow.
At this stage, github won’t report the job status. This is normal! We’ll fix this in the next step!
Reporting the job status
I’d advise taking a break at this point, because this is by far the most frustrating step.
Welcome back! Hopefully you’ve had a long meditation session/drink/whatever keeps you sane when doing really annoying things.
Now it’s time to get to the final and most frustrating part of the process – actually updating GH build status. Are you ready?
Creating a jenkins secret to store the token
Did you save the token earlier? No? Don’t worry, you can just make another. Now that you have a token, time to store it securely* in Jenkins.
* They’re encrypted but can be decrypted if someone has access to the jenkins instance. Hopefully, you’ve secured it, right?
- Click credentials from the home page
- Click on the credential store where you want to store it. If you have no idea what that means (I sure don’t), click on the ‘Jenkins’ store.
- Click on the domain, such as “global credentials”
- Click on “add credentials”
- Kind is “secret text”
- The secret is your token from earlier.
- Select a meaningful id and description
Add the secret to your job
- Go back to your jenkins job and click on ‘configure’, which is conveniently placed right next to the ‘delete job’ button, which you don’t want to accidentally click.
- Within “Build environment”, check Use secret text(s) or file(s)
- In bindings, select ‘secret text’. This should expand a new dialog.
- In variable, type in the name of the environment variable you want to use, such as GH_TOKEN
- Select “Specific Credentials” and select the id of the secret you made in the previous step
Report status to github
Now, it’s time for the true task! Report the status back to Github. While still on the same configure page, it’s time to tweak the build job slightly.
Put the following before running your test command, to set the status as pending:
export REPO_NAME='YOUR_REPO_NAME'
export JOB_NAME='YOUR_JOB_NAME'


curl "//api.GitHub.com/repos/$REPO_NAME/statuses/$GIT_COMMIT
      ?access_token=$GH_TOKEN" \
-H "Content-Type: application/json" \
-X POST \
-d "{
    \"state\": \"pending\",
    \"context\": \"jenkins/$REPO_NAME\",
    \"description\": \"Jenkins\",
    \"target_url\": \"//YOUR_JENKINS_URL/job/$JOB_NAME/$BUILD_NUMBER/console\"
}"
This will set your git commit to pending!
Now, because we’re not using pipelines, and because you don’t want the job to stop if it fails, you need to change your test command. So if your command is, say, bash test.sh, you need to change it thusly, so that you capture if it succeeds or not. This makes the assumption that your command will return a non-zero status if it fails, which is true for most test frameworks.
First export TEST_ERROR=0, we’ll use this to store the error if any
Change your command from bash test.sh to bash test.sh || TEST_ERROR=$?
Now, when you want to report the status, you can check if we caught an error or not:
if [ $TEST_ERROR -eq 0 ] ; then
    curl "//api.GitHub.com/repos/$REPO_NAME/statuses/$GIT_COMMIT
          ?access_token=$GH_TOKEN" \
    -H "Content-Type: application/json" \
    -X POST \
    -d "{
        \"state\": \"success\",
        \"context\": \"jenkins/$REPO_NAME\",
        \"description\": \"Jenkins\",
        \"target_url\": \"//YOUR_JENKINS_URL/job/$JOB_NAME/$BUILD_NUMBER/console\"
    }"
else
    curl "//api.GitHub.com/repos/$REPO_NAME/statuses/$GIT_COMMIT?access_token=$GH_TOKEN" \
    -H "Content-Type: application/json" \
    -X POST \
        -d "{
        \"state\": \"failure\",
        \"context\": \"jenkins/$REPO_NAME\",
        \"description\": \"Jenkins\",
        \"target_url\": \"//YOUR_JENKINS_URL/job/$JOB_NAME/$BUILD_NUMBER/console\"
    }"


    exit $TEST_ERROR
fi
This will run a hook to update to success or failure, depending on the value of $TEST_ERROR. It’ll also exit with a non-zero status if there was a failure before, telling jenkins to record the failure as well.
That’s it!
If you’ve done everything right, you should see the status reported to GH, either success or failure:
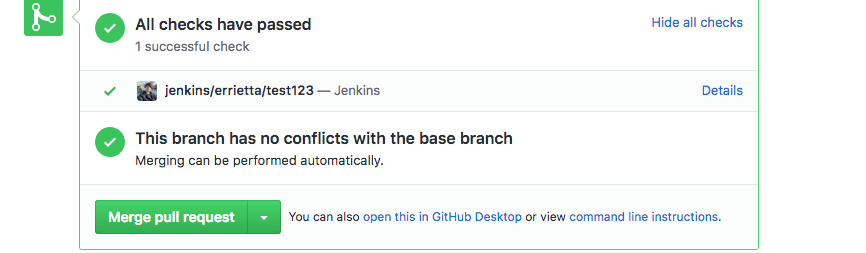
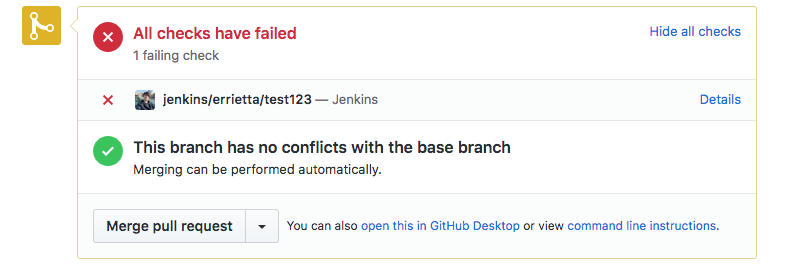
Congratulations! After much pain, you have a working integration.
Further steps
- You probably want to look into jenkins multibranch pipelines so you can at the very least programmatically act on build status without having to write a hacky shell script.
Thanks
Thanks to the blog posts “adding a github webhook in your jenkins pipeline” and “how to update jenkins build status in github”, which were extremely helpful to me. Even though I couldn’t directly replicate what they did, my solution is really a Frankenstein’s monster-style stitch up of both of them, so yay for them.
Thanks for the wonderful folks at the jenkins artwork page for the image used as a featured image for this post. As much as I complain about jenkins, it’s probably one of the most powerful CI tools I’ve ever used.
And thank you for reading! Let me know if you want me to make myself suffer further by making a write-up about multi branch pipelines! I’m sure watching me attempt to write Groovy will be amusing to someone…
And apologies if this post seems more passive-aggressive than my usual style, but to my defense this was a real adventure…
Hello,
nice thing but how did you solve the problem, that jenkins is changing ” to ‘ ?
‘Content-Type: application/json’ -X POST -d ‘”{\”state\”: \”pending\”}”‘
Not sure but I don’t recommend doing this this way anymore, this is better: https://www.errietta.me/blog/jenkins-github-multi-branch/
The same can be achieved with https://github.com/jenkinsci/pipeline-githubnotify-step-plugin
Example pipeline:
stage(‘Code formatting’) {
steps {
script {
last_started = env.STAGE_NAME
context = ‘Jenkins-goimports’
}
githubNotify context: ‘Jenkins-goimports’, description: ‘Testing code formatting…’, status: ‘PENDING’
testCodeFormatting()
}
}
stage(‘Unit tests’) {
environment {
GITHUB_TOKEN = credentials(‘GITHUB_TOKEN’)
}
steps {
githubNotify context: ‘Jenkins-goimports’, description: ‘Code formatting ok!’, status: ‘SUCCESS’
script {
last_started = env.STAGE_NAME
context = ‘Jenkins-UT’
}
githubNotify context: ‘Jenkins-UT’, description: ‘Executing unit tests…’, status: ‘PENDING’
executeUnitTests()
}
}
stage(‘something_else’) {
steps {
githubNotify context: ‘Jenkins-UT’, description: ‘All unit tests have passed!’, status: ‘SUCCESS’
somethingElse()
}
}
post {
failure {
githubNotify context: context, description: last_started, status: ‘FAILURE’
}
}